|
We've moved! Here's a link to our area. Orofino Flipbook For inquiries, please email me. email: bob@rodgerspistolsmithing.com |
 |
Home![]() Photo
Gallery
Photo
Gallery![]() Pistolsmithing Classes
Pistolsmithing Classes![]() Photo Gallery 2
Photo Gallery 2![]() Photo Gallery 3
Photo Gallery 3![]() Links
Links![]()
1911 Pistolsmithing Classes
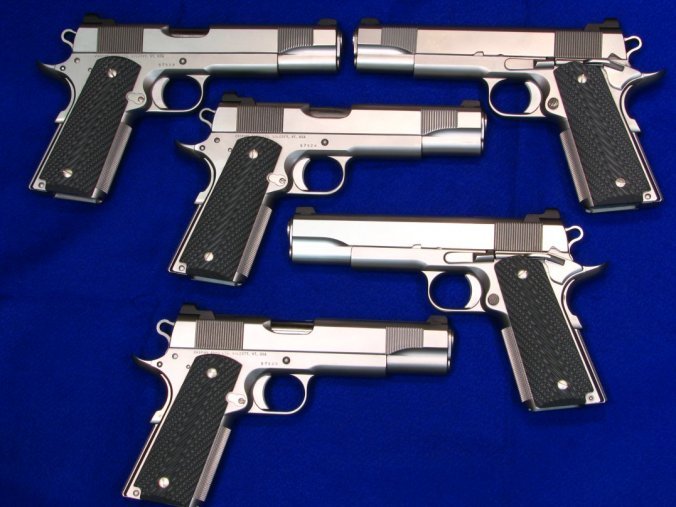
Examples of Student Pistols
Whether you want to begin to learn enough to become a working pistolsmith, have the pleasure of building your own 1911, or simply want to do better with care and maintenance of your pistol, a pistolsmithing class is a good place to start.
"As a shooter for 30 years, owner of several custom built 1911s, a hobby gunsmith, and a professional mechanical engineer, I thought I knew something about the design. But after a week of mentoring with Bob, I learned how to build and set up the gun so that they run, and run, and run, a level of performance I had rarely seen before. I can't recommend his class highly enough." Frederick Chen, PA
Due to the demand created by the two-day Maintenance and Minor Repair, and the 1911 Trigger Job classes he was already teaching, Bob Rodgers has recently decided to carve time out of his schedule to host an occasional pistolsmithing class at his shop in Orofino, Idaho.
Class Information:
The pistolsmithing classes are limited to 3 students and last 6 days, typically beginning at 7:00 AM on a Monday and ending on the following Saturday around 3:00 PM. Expect long days at the shop; we have a lot of material to cover, and student speed dictates quitting time, not the clock.
The course fee includes the Caspian slide, Kart Match Grade barrels, best quality small parts, and a set of grips from VZ (no parts substitutions). The class fee also includes the use of all shop equipment and supplies. Not included are food, travel expenses, and a small assortment of hand tools along with a Dremel tool and a good quality dial or digital caliper. You'll receive the complete tool list at registration.
I've recently made one change to the class. This involves the Caspian frames. I'm now having students bring their new frames to class with them when they come.
The frames will already be on order from Caspian.
I have contracted my friend Pete Single to checker the frames and mainspring housings. Pete will also flat top and serrate the slides in an arrowhead pattern, and machine front and rear sight dovetails. The front wall of the ejection port will be extended to aid live-round ejection, and the front sight will be cut to size, serrated, profiled, and refinished.
If you're not familiar with Pete's work, he enjoys the reputation of producing the highest quality machine checkering in the world.
With his help, this year's guns will be among the finest we've ever produced in a class, with modifications normally only found on full-house customs.
When your frame arrives at your local dealer, Pete's work will already be completed on it.
The slide/frame machining package is included in the class payments.
When they are completed, Caspian will let me know and I'll get back in touch with you.
You'll then need to contact Caspian (mention you're coming to my class) with your receiving dealer's FFL information and they (Caspian) will ship the frame to them for transfer to you.
Caspian is selling these frames to you on a one-time basis at gunsmithing prices. The stainless frame should be approximately $200.00 plus shipping. You'll be responsible for the shipping from Caspian to your receiving dealer. This means there will be no overnight return shipping and insurance from Idaho to your home state ($120.00) added to your final balance since you will now be able to take your completed 1911 home with you. And no waiting for shipment!
In summary:
You receive and get the frame transferred to you.
You bring it with you to class.
You take your completed 1911 home.
Class Fee: $5950.00 (does not include the cost of your frame, does include the custom machine work, checkering, etc. to your slide and frame).
The total of the registration fee ($200.00), class fee including the slide and all small parts, and including all frame and slide modifications is $5950.00, broken into two payments of $2975.00 each.
Please read the following carefully:
The only way I can afford to take my shop "off line" to prep for, and then host the class, is to insure the class is full. The class cancellation policy is fairly draconian to reflect this concern.
The $200.00 registration fee is NON REFUNDABLE, for any reason. Sorry, but this policy is non-negotiable.
The remaining payment of $2975.00 is due NO LATER than 60 days before the class begins.
Sending your first payment indicates that you have read, understood, and accepted this cancellation policy.
IMPORTANT: Caspian frames are not legal for import into California unless you are LEO. If you have any doubt about the legalities of receiving the frame in your home state, please check it out before you sign up.
email:bob@rodgerspistolsmithing.com
What do I get for my money?
Six days of instruction in a fully equipped pistolsmithing shop, not some "make-do" location.
An emphasis on TOTAL reliability in the build without ignoring both cosmetic and comfort details like dehorning of the gun for carry.
Small class size, three students per class, guarantees you more individual attention.
A complete, detailed manual written specifically for the class that's yours to keep for future reference.
All parts are provided and are of top quality. Suppliers include, Brown, Wilson, Kart, Caspian, and Smith & Alexander. Grips are by VZ.
Many tools are provided for your use, including some designed in-house just for these classes. This keeps your tool costs low.
We only use gunsmith fit barrels and bushings. Every barrel fitting detail is covered.
Trigger work is thoroughly covered. Along with hammer and disconnector prep, you'll be taught how to mate the sear to the hammer hooks for a safe and long lasting trigger job.
Professional machining services are offered for you to personalize your gun. These include flat-topping and serrating the slide in an arrowhead pattern and advancing the front wall of the ejection port to insure the clean ejection of a live round.
Your pistol is completed and test-fired, front sights are machined to the proper height, profiled AND, along with the rear sight, refinished.
The satisfaction of knowing YOU built your gun, and you're taking home enough knowledge to do it again.
This is not a machining class, the pistols are built using hand tools. It would be a disservice to students to teach them methods they couldn't duplicate without a 20-30 thousand dollar machine shop at their disposal. Great looking, accurate, and reliable pistols can be built by hand, we've proven it many, many times.
Nothing (no trade secrets) is held back. You will be taught the same methods that I use to insure the custom guns I build run from day one. The trigger jobs are EXACTLY as I perform them, with the same parts and the same tooling.
The instruction has been fine tuned over the years to insure each student gets the attention they need to successfully complete each step in the building process.
If you're interested in spending a week in this beautiful area and learning more about pistolsmithing, read on! Here is a link to the Orofino Chamber of Commerce: Orofino
See Frequently Asked Questions, at bottom of page.
"Bob Rodgers Pistolsmithing class is well worth the time and expense. A week spent with gun-nuts and gear heads, building your very own 1911--to Bob's incredibly high standards can only be considered one of life's high points. That you get to go home with a functioning work of mechanical art makes it even better.
Bob is as organized as any teacher I've known. Daily works follows his detailed class outline, which is really a how-to on building 1911s. Individual work areas have sufficient space, are well equipped and well lighted.
In addition to having a good shop layout, Bob finds ways of explaining the fine points of 1911 component fitting that everyone can comprehend as well as utilize in their own build. Some pistolsmiths do incredible work, but have a hard time explaining how it was done. Bob does great work and is a superlative teacher. By the end of the week, I predict, you'll have developed an "eye" for how finished and properly mated components should look. Further, you'll know what has to be done to achieve that goal--I'm using today techniques learned in his class." Dave Manson, Manson Precision Reamers
Good friend Buck Leahy, who was a student in a recent class, was kind enough to grant permission to use material from the post he made on the 1911 Forum about his experience. What follows is just a taste of the very thorough chronicle he posted. For those who wish to pore over the details, see Buck's post.
Overview of the Rodgers Pistolsmithing Class
Last year, Bob Rodgers hosted a small group of intrepid 1911 fans in his shop for a special class. Beginning with bare Caspian frames and slides, and all the parts necessary to build complete 1911s, Bob spent six long days with his charges, resulting in some accurate, fine looking pistols. His wife told me that at the conclusion of the class he was happy but exhausted.
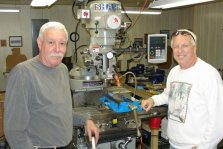
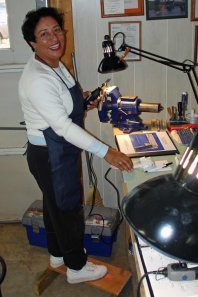
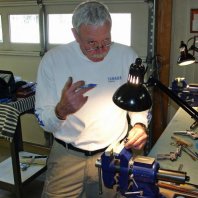
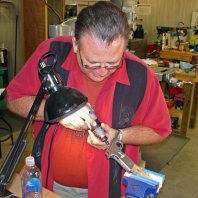
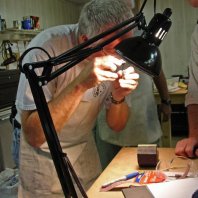
As one of this year's class, I arrived in Mountain Home this afternoon with friend, fellow student and training pal Steve to be informed by HWL Irv that I had been elected to chronicle our daily exploits, and so I shall. Here are a couple of shots of Bob's shop...
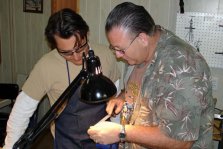
Bob and Steve in the Shop (and if Steve looks a little dazed, cut him some slack - he'd just driven 17 hours to get us here).
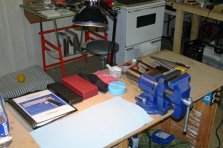
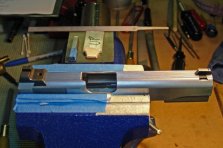
My work space: overhead light, 300 pound articulating vise (OK, maybe not quite that heavy but massive) and hand tools. I asked for the mattress and ball on the floor, too, but Bob said they belonged to Wil (the adorable dog who owns Bob and Sandy) and that I had no chance.
Watch this space for each day's [mis]adventures of this crew as they try the patience and good humor of a great pistolsmith, all-around great guy, and demonstrable glutton for punishment, Bob Rodgers.
DAY ONE
Since setting up our workspaces yesterday afternoon, the 1911 parts fairy had placed a box with our name on it at each workspace, containing slide, frame and all associated small parts for the 1911. Bob had already done the preliminary measuring and rough fitting of the frames and slides before we arrived...
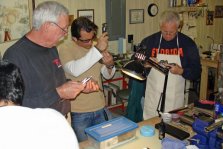
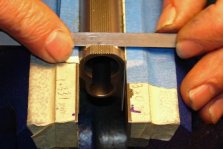
As seen in the workspace photo added above, Bob provided a three ring binder with a very comprehensive workbook in it. One of the first steps therein, once we'd been briefed on the safety rules that applied in the shop, was to learn how many different critical dimensions there are on the frame and slide of the 1911, and how to measure them accurately. The adverb matters, as Bob discovered several unique artistic interpretations of operating a dial caliper. When your scribe couldn't account for a consistent difference of .002" between his measurements and Bob's, he quietly re-checked the zero on his device and discovered it to be EXACTLY .002" off. The Lord loves a window licker, and thank goodness. Below, Bob shows Ricardo and Steve how to measure the correct way.
We completed the frame/slide fit by gently lapping with a mixture of JB bore cleaner and oil, leaving us with slides that moved freely from full recoil back to battery, and smooth as glass.
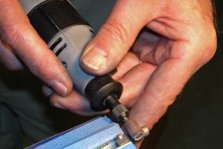
Returning to dimensions, Bob explained that many feed ramps in production guns and frames today are shallow, and not all at the correct angle. He had re-milled each of ours to the correct specs, but the milling marks were still visible on the ramps, so he had us install conical Cratex polishing bits in our Dremel chucks, and polish the marks out... As the first Dremel fired up hit about 12,000 RPM, Bob said, "Ah, the sound of American industry." Here's a shot of Steve in action with the Dremel.
Next up was fitting our barrel bushings, first to the barrel, then to the slide... It was during this exercise, that we all came to know and love this helpful bit of wisdom: "The object of filing isn't to make something shiny, it's to remove metal."
Keeping constructively occupied is easy - there is ALWAYS more to be done, and we took only one brief break for lunch in the late morning, then another quick break in the afternoon.
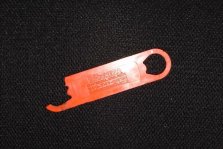
Final bushing prep consisted of applying lapping compound (a more abrasive mixture than what we'd used on the slides and frames) to the exterior surfaces of the bushing, re-installing it (but keeping the slide out of battery since the bushing was already fit to the barrel at the muzzle and we didn't want to destroy that snug fit), and using a bushing wrench to twist the bushing back and forth in the slide until the desired degree of resistance had been reached. The results of trying to muscle a bushing that hasn't yet been Sharpie'd, test-fitted, and filed enough are below. It was the only bushing wrench destroyed on Day One!
The final big event of the day was to fit our barrel hoods to the slide.
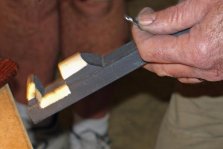
The mantra of the day had to do with our filing: "Level and true," or moving the file in such a way as to make a surface cut that is square to existing axes, and doesn't fundamentally alter the design of the part being filed on. It's a hell of a lot easier to discuss than it is to execute. Here's a shot of Dwayne working with Ricardo on the final strokes at the back of his barrel hood.
We left the shop at about 1800, amazed at both how much we had accomplished, newly impressed with the amount of precise handwork that can go into building a reliable, accurate 1911 (although determination of those virtues for our guns comes later this week), and dog tired after only the first day. Bob, Dwayne, Irv, and Drayton were all generous with their assistance and patient with our questions.
Tomorrow morning, we kick off by fitting the lugs!
"I had the pleasure of taking Bob's pistolsmithing class in April of 2009 and built the best handling and most accurate 1911 that I own. It is a real pleasure to shoot it, plus I have a decent understanding of the working components to perform proper maintenance including replacement of most parts if that becomes necessary. Bob is not only expert in the 1911 but also a great teacher who spends the time to answer a student's question regardless of how trivial it may seem... I highly recommend the class for anyone wanting an outstanding custom 1911 and having the interest and patience to follow Bob's tutelage." Charles Gottlieb
DAY TWO
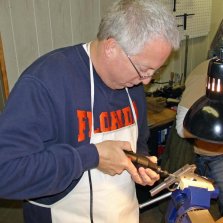
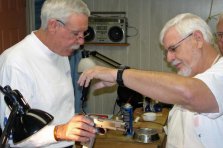
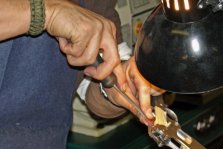
We began today by cutting the lower lugs on our barrels. The photo below shows Bob coaching Charles on how much pressure to apply to push the slide forward, which he did as he turned the lug cutter clockwise.
The lugs were fitted by repeatedly smoking them with carbon from a lit candle, inserting the barrel and bushing into the barrel, mounting the slide onto the frame, inserting the slidestop and racking the gun in and out of battery a few times... This was yet another painstaking process in the build sequence. Only when the lugs were deemed worthy were they ready for lapping with the same JB bore cleaner and oil we used on the slides and frames yesterday, this time applied to the lugs. Each person rapidly racked the slide back and forth 200 times with a lightweight recoil spring in the gun before disassembling the gun and cleaning the lapping compound out of it. This was one of Bob's favorite parts of the class - the sound of guns clacking in rapid cycling, beginning to sound something like real pistols!
The chambers in the Kart barrels were given a finish reaming to set headspace, and to cut the "leade," or the area between the chamber and the start of the barrel rifling. Below Dave Manson (of Manson Precision Reamers, who better to show us?) demonstrates the proper technique for using the reamer in the chamber and rifling of his barrel.

After measuring from the bottom of the link pinhole to the bottom of the lug cuts, Bob provided us with an appropriately-sized link to install, and to re-assemble the gun.
We then put the barrels onto our frames and pressed them toward the rear of the gun... Bob showed us how to mark the barrel throat with blue Sharpie, and gave us a demonstration of how to re-throat the barrel, being careful not to touch the defined edge at the rear of the chamber itself, lest we gouge out material that could result in bulged or blown cartridge cases.
This provided us with about the fourth opportunity to ruin a very expensive barrel, and it was a little intimidating. Bob provided a throated Colt barrel for us to look at as a model when envisioning how we'd throat ours, and we were off to the races... We all polished our ramps like mirrors, put a 45 degree radius on the inside top of the barrel hood to facilitate feeding, also gently radiused the sharp corners of the barrel hoods and were done with the barrels.
Next up was turning in the special fitting bushings that we'd been using, and installing the bushings that we'd so painstakingly fitted to our guns yesterday. Now that the barrels were complete, we installed them and discovered that some of us had some "spring" to the barrel in lockup. This resulted in the need to remove some material from the bushing and Bob blessedly helped us with this task on the lathe.
�He�s not just one of the world�s top tier 1911 smiths � Bob Rodgers also has the uncanny ability, wit and patience to transfer much of his knowledge, gained through long and hard experience, to a small group of fortunate students in only one week of building their own custom 1911s from the ground up. The days are long, but incredibly rewarding. If you ever wanted to know what turns a pure production 1911 (or set of parts) into a true custom-built pistol, this is the place to learn from a master, and to have a great time while building a gun that will be uniquely yours. It�s not inexpensive, and it�s not easy to carve out the time to get to Mountain Home, Arkansas and back. But if you�re a hard core 1911 fan, it�s the opportunity of a lifetime, and I encourage you to take advantage of it.� Buck Leahy, Lieutenant Colonel, United States Army (Infantry), Retired
DAY THREE
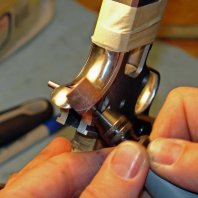
Tuesday night, we had installed the jigs for filing off our frame tangs, so that we could then hand-fit the beavertail grip safeties to our pistols... We also began to see more use of blue painter's tape (or just plain masking tape) covering parts of the frame, to protect the surface of the stainless from both wandering file tips and edges and from being laid upon bench blocks and beaten multiple times over the course of the day. The end result comes to look like what Bob called "mummy guns." We've learned the hard way that you can take scratches and dings out of stainless steel, but it isn't necessarily a quick or easy process, particularly when you have so many other things to do.
Thus began a series of iterations: mark the radii of the tangs with blue ink, install the grip safety using the tapered pin (first from one side of the gun, remove the pin, repeat from the other side)... We then removed the pin and the grip safety, and examined the marked tangs for signs of white metal (high spots) that we'd then gingerly file down, while rotating the frame so as to maintain the nice circular radii we had established with the jig.
Eventually, the tapered pin would slide all the way through the frame, and was replaced with the thumb safety (or in the case of our resident southpaw, yours truly, the two thumb safety pins).
Once a good fit had been achieved, lapping compound was applied to the tangs, and the tap, tap, tap process was repeated with a sear spring and mainspring housing on the frame until the grip safety would smoothly travel in and out.
I was still searching for the right fit at lunchtime, while most others were already blending their fitted safeties into the frames, searching for the graceful marriage of frame and grip safety below the beavertail and on top of it... To his everlasting credit (and my undying gratitude), Bob couldn't stand watching me struggle anymore, so he helped me wrestle that SOB to the ground, and voila, not too long later I had a fitted grip safety.
As people finished their blending, they returned to other productive work, such as continuing their de-horn jobs on frame and slide.
Bob then gave us a quick demonstration of how to flare an ejection port on a gun he's building (he had previously lowered the ejection port), and we got to see how one obtains that neat triangular recess behind the port. He also explained how some smiffs will extend the bottom front portion of the ejection port to facilitate the unloading of full up rounds.
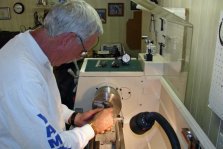
Next Dwayne helped us polish our mainspring tunnels, and instructed us on how to quickly even off the top and bottom of our mainsprings on the grinder. Following Q-tip cleanup and lube of the mainspring tunnel, we installed the mainsprings (23 pounds, as J.M. Browning specified), their top and bottom fittings, and the retainer pins.
Following that, we were shown by Dwayne how to use a small round carbide cutter to subtly enlarge the plunger tube holes on the inside of our frames....
Between the chamfered holes, red LocTite and a firm installation job (using a metal tube protector during the crushing), our plunger tubes are now rock solid on the frame.
The day's last activity was installing and fitting our ejectors, in this case Caspian extended ejectors.
The next step was checking clearance of the ejector with a magazine inserted to the very top of the magwell... We also checked for clearance with the top round in a magazine, using dummy rounds, of course, and discovered that nearly all our ejector noses had to be shortened.
We knocked off a little before 1800, and the mental and physical fatigue are taking their toll in different ways... [an] example is seen in the hands of one of our worthies...
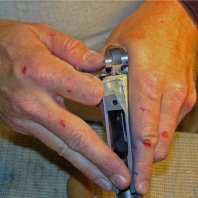
�For those who enjoy shooting the 1911 platform, you will find no better investment of time or money The information Bob so generously shares in the building of a pistol will serve you well in developing a complete understanding of the design. Even if you never build another gun, the knowledge and skills learned in the course will help you diagnose and repair issues should they arise. While it is fun, it is also hard work. My hands have still not forgiven me." Steve
DAY FOUR
We began the day with some inspections prior to any part fitting. In checking the interiors of the magwells, we found that two of our six frames had enough burrs or other protrusions on the inside to actually hinder the free insertion and dropping of magazines. This required a LOT of hand filing to eliminate problems. The hands you see below are Ricardo's, who had the most work to do at this stage.
We then installed (by threading and staking, no LocTite) our grip screw bushings. Moving to fit our new triggers into the frames... we began by inspecting the triggers and prepping the trigger bows... We then checked the trigger tracks inside our frames, and found several that needed filing or stoning to smooth them out.
Bob then showed us a large scale mock-up of the blocking arm of the grip safety, and how to adjust the amount of pressure/depression of the safety that is required to fire.
We installed new magazine catches, and several, including mine, had to be relieved with a Dremel tool and small sanding drum, because they were "trapping" empty magainzes in the mag well at full depression of the catch.
We then fitted our extractors and firing pin stops, ensuring that we wouldn't have any "clocking" of the extractors...
When complete, we installed the extractors and used dummy rounds to determine the tension of the extractor as installed, and adjusted extractor tension as necessary.
We then installed our front and rear sights, using a 65 degree Novak cut dovetail file, a triangular file with two safe sides. Although we were using Novak front sights and slides with Novak dovetails cut into them, a good amount of dovetail filing was required before we could tap the sights into place.
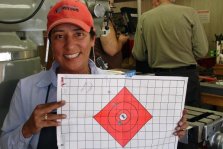
The rear sights (we used the Yost Bonitz Professional Grade sights) were also Novak cut sights, but the slides needed even more work to get them in. Tomorrow, when the guns are functionally completed, we'll shoot them to determine the adjustments for point of aim/point of impact. The sights will be painted prior to re-installation on Saturday, after the frames and slides have been bead blasted.
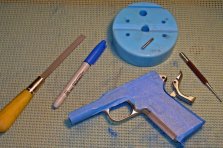
We then prepped our parts for the trigger job... We also gently deburred and radiused the outside surfaces of the disconnector.
We polished the flat sides of our sears, as well as the bottom of the legs, which were radiused... We inspected the hammer hooks of our hammers, then stoned them twice...
We then put a slight radius on the top of the legs, something easier said than done. Here Steve is checking his work with a reliable technique - a high powered jeweler's loupe and lots of incandescent light.
Finally, we broke the rough edges on our hammer struts using crossing files, sandpaper and the buffing wheels, then affixed our struts to the hammers using the hammer strut pin (hint: start the pin by hand, tap it slightly with a hammer, then use the vise to push it in flush).
DAY FIVE
This morning, we did the trigger jobs. One of the many great lessons we've learned this week goes beyond one of the first, that there is no such thing as "drop-in parts, " at least in guns that don't rattle like a drawer full of marbles or shoot groups the size of ZIP codes. We've also come to have a firsthand appreciation for the fact that every 1911 is different. We now have, for example, six nearly completed guns. Each has identical frames, slides, and small parts. The lone exception is the ambidextrous safety on mine. Yet each of these guns has had its own peculiar challenges to be overcome, and the trigger jobs were no different.
Having prepped our disconnectors and sears yesterday, today we took out our Ed Brown sear jigs, and brown and white (fine and extra fine) square polishing stones... It was vital to achieve a surface across the sear that was perfectly even from one side to the other. The jig and shim on which the stone rode helped substantially, but this was a hand-held operation, so the old variable of human limitations constantly asserted itself. We then put the completed slides on the guns, and installed the sears to try the triggers.
People began testing their trigger pulls using digital trigger pull gauges. Weights came in from roughly 3.0 to 4.0 pounds, and the triggers were as crisp as baked potato chips. The extra work in stoning the two angles had really paid off.
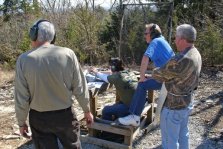
Finally, it was time to clean and lube up the guns, grab our eyes, ears and ammo, and head for the test range out back.
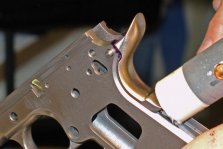
After all testing was complete, we returned to the shop, removed our sights, polished the tool marks off the top of the front sight blades, and in some cases, did a quick de-horn of the rear sights before turning them all over to Dwayne and Drayton for bead blasting and re-finishing/baking/curing.
Drayton then demo'd how to blend the back end of the gun using a file, so that all visible surfaces (slide top, extractor, ejector and slide rails) were at even height, and faithful to the dual radii of the back of the slide. With that, a few tackled the blending, while others used the remaining few minutes in the shop to continue de-horning their guns.
Tomorrow, we'll complete blending the back of the guns, complete de-horning, bead blast the guns, then install the re-painted sights. And then, miraculously, we're done!
�To spend a week in a beautiful setting with like-minded people enjoying their comradeship plus building a custom 1911 pistol was an incredible experience for me. Bob's knowledge of the 1911 platform and his ability to transfer his knowledge to his students is worth the price of admission alone. Any time I can spend with Bob Rodgers and learn from him is a blessing.� Dwayne Greufe
DAY SIX
Short version: we finished (or started) blending the rear of the guns as described yesterday; we blended the bottom of the guns...; we made any last minute cosmetic repairs (sanding out tool marks and scratches, etc.); we completed our dehorning jobs...; we broke the gun down completely, and bead-blasted virtually every part that shows on the gun...; we installed our now Parkerized front and rear sights...; we thoroughly cleaned all our parts, then lubed and assembled our complete finished guns for the very first time.
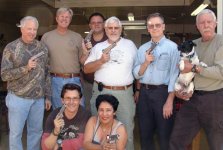
I hesitate to say "complete" because one of the drawbacks to this class is learning to really see the details in a gun. Every one of us knows about a few small flaws or areas that just need a little more work on our pistols, but it's work that will have to wait. After a couple of group pictures, with the students grinning from ear to ear, and Bob beaming like a proud parent of six new babies, we headed back to the hotel to change and get some dinner. Bob and Sandy joined us, and a great time was had by all.
More photos of student-built guns can be seen here: Student guns
Frequently Asked Questions
Q. What local motel do you recommend?
A. We always stayed at the Konkolville Motel when we visited the area to fish. It's quiet, clean, and comfortable, and the owners are great folks.
Konkolville Motel
If you are looking for more amenities and don't mind the higher rates, the Best Western Plus Lodge at River's Edge is nice. Best Western
Q. Do I have a choice of the parts I use to build my gun?
A. I'm sorry, but not in class. You'll certainly have the knowledge and ability to make any changes you want after the class. Six days is a very short time (as y ou'll find when you are here) to build a 1911 to the standards we try to maintain. The only way to accomplish this is by having everyone working on exactly the same parts at the same time.
Sunday afternoon and evening before class starts, I�ll be resting up for class. I�ll have the shop open early on Monday morning, though, in plenty of time for students to get set up.
Class starts promptly at 8:00 am on Monday.